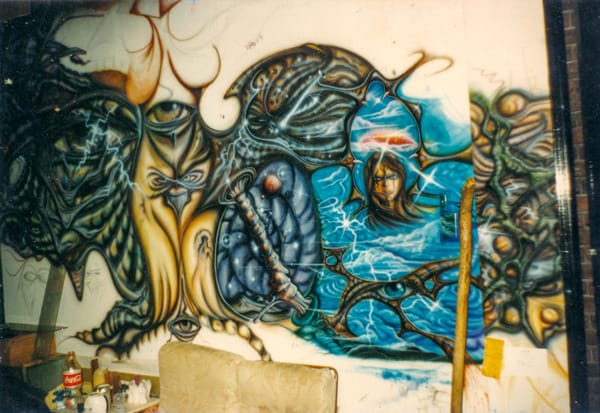
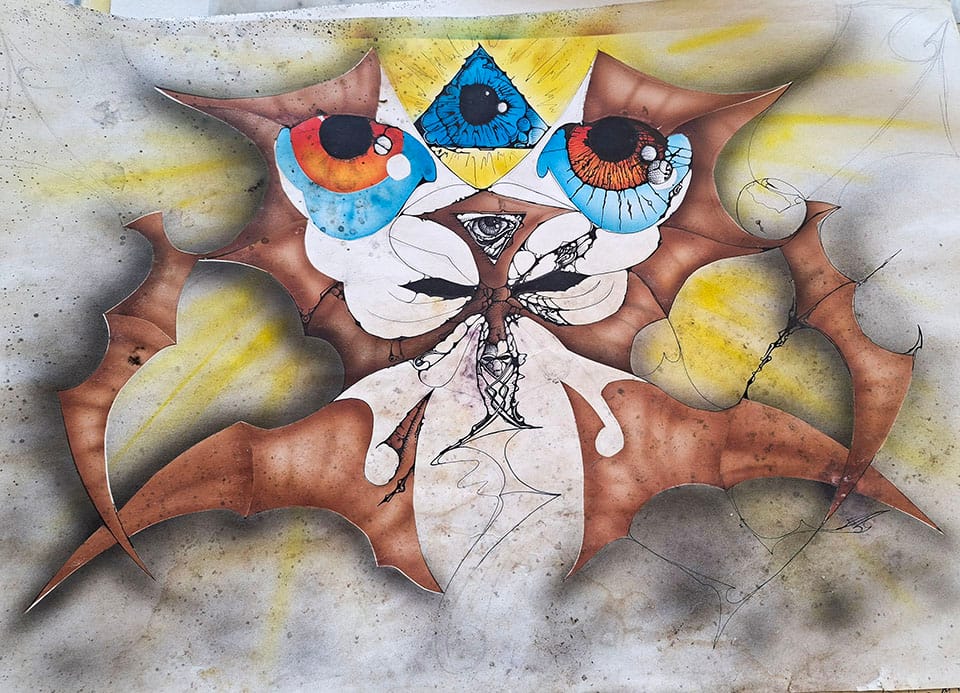
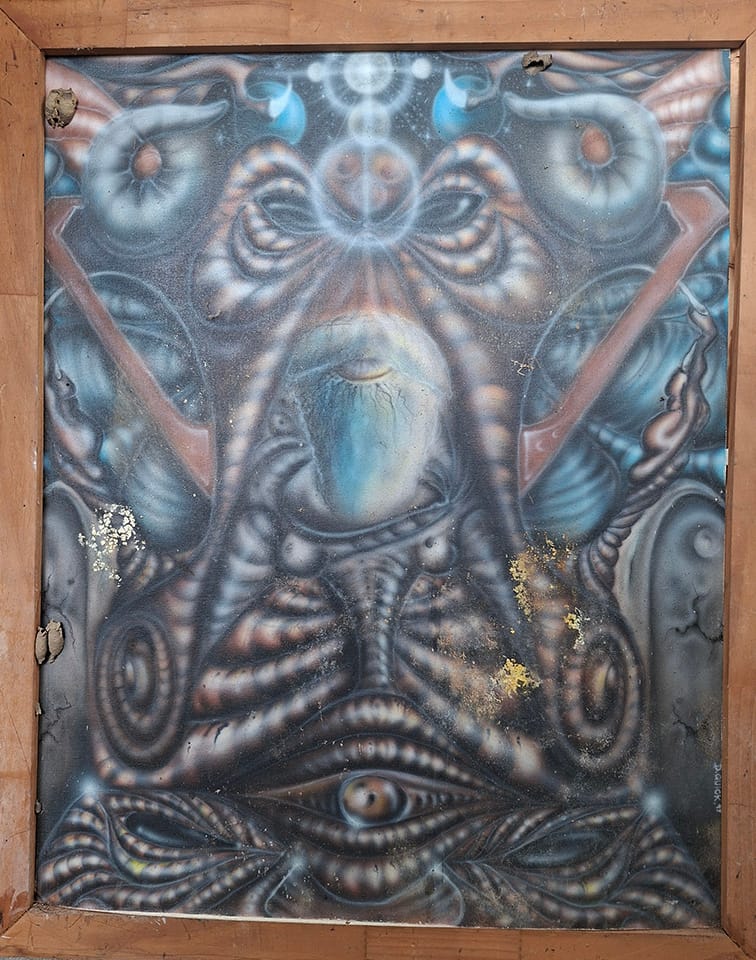
Airbrushed artwork by Damien K Quick adorns the bedroom walls
My Early Airbrush Work (1993–2000)
A look back at my early airbrush years from 1993–2000 — learning the hard way with cheap gear, TAFE night classes, automotive acrylics, and freehand experiments, plus a gallery of the paintings (and what became of them).
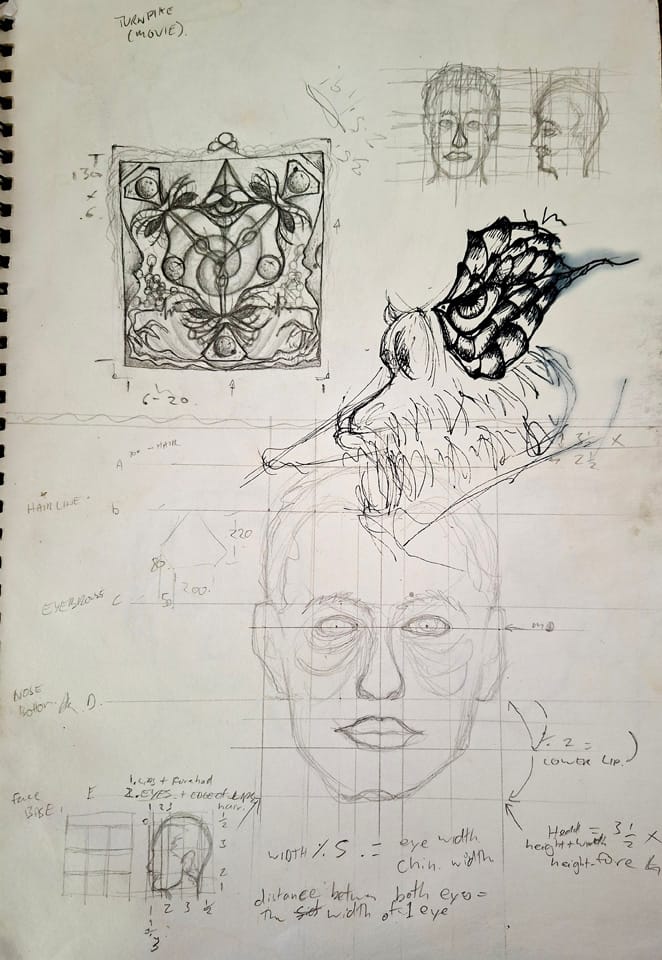
1993 was a huge year for me artistically. I moved from a private Christian high school with no art program to a state high school with Art, Visual Art and Design — plus integrated TAFE subjects. I spent most of the week in the art classroom, In fact I did so many elective subjects that on wednesday I would only have one math lesson, then the rest of the day was in the art class. We didn't even leave for lunch, but that is another story.
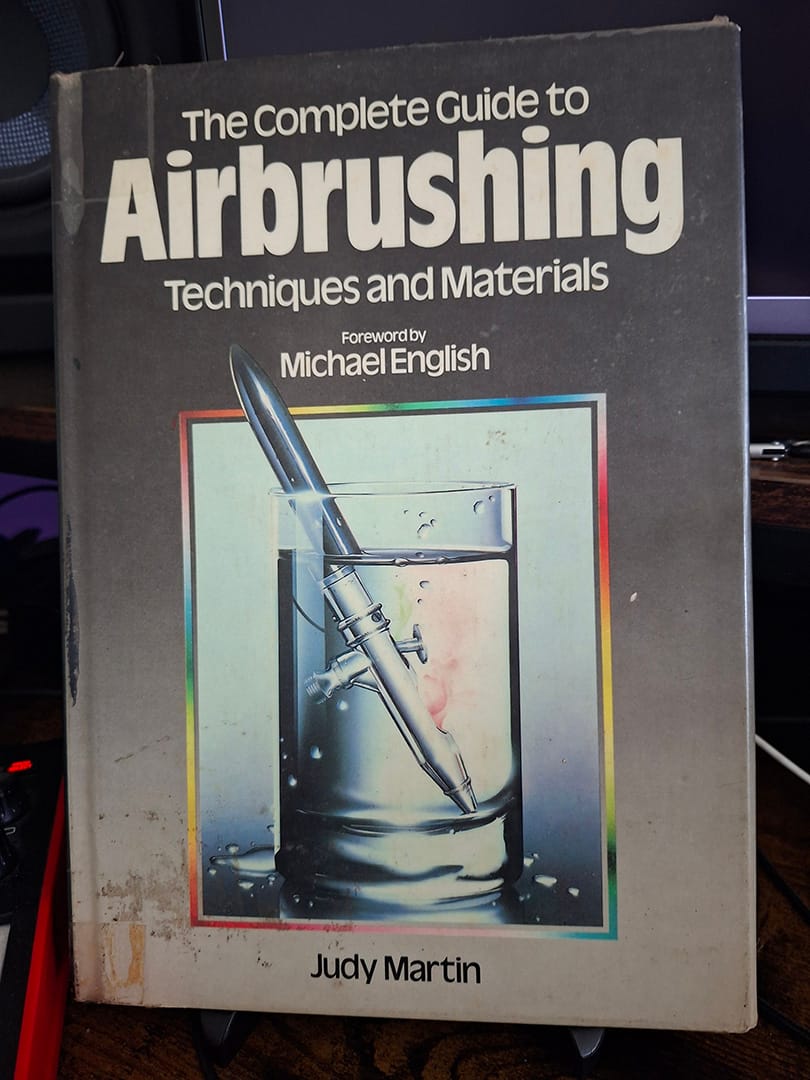
It was in this class I came across a book called The Complete Guide to Airbrushing Techniques and Materials published in 1983. This book was fascinating and had everything from the unbelievably photorealistic to Terry Gilliam's airbrushed animation from Monty Python. I read through it so many times the teacher let me keep it despite the stamp on the inner cover which states 'Property of the schools art department' . I still have it to this day. (Below)
The Complete Guide to Airbrushing Techniques and Materials published in 1983.
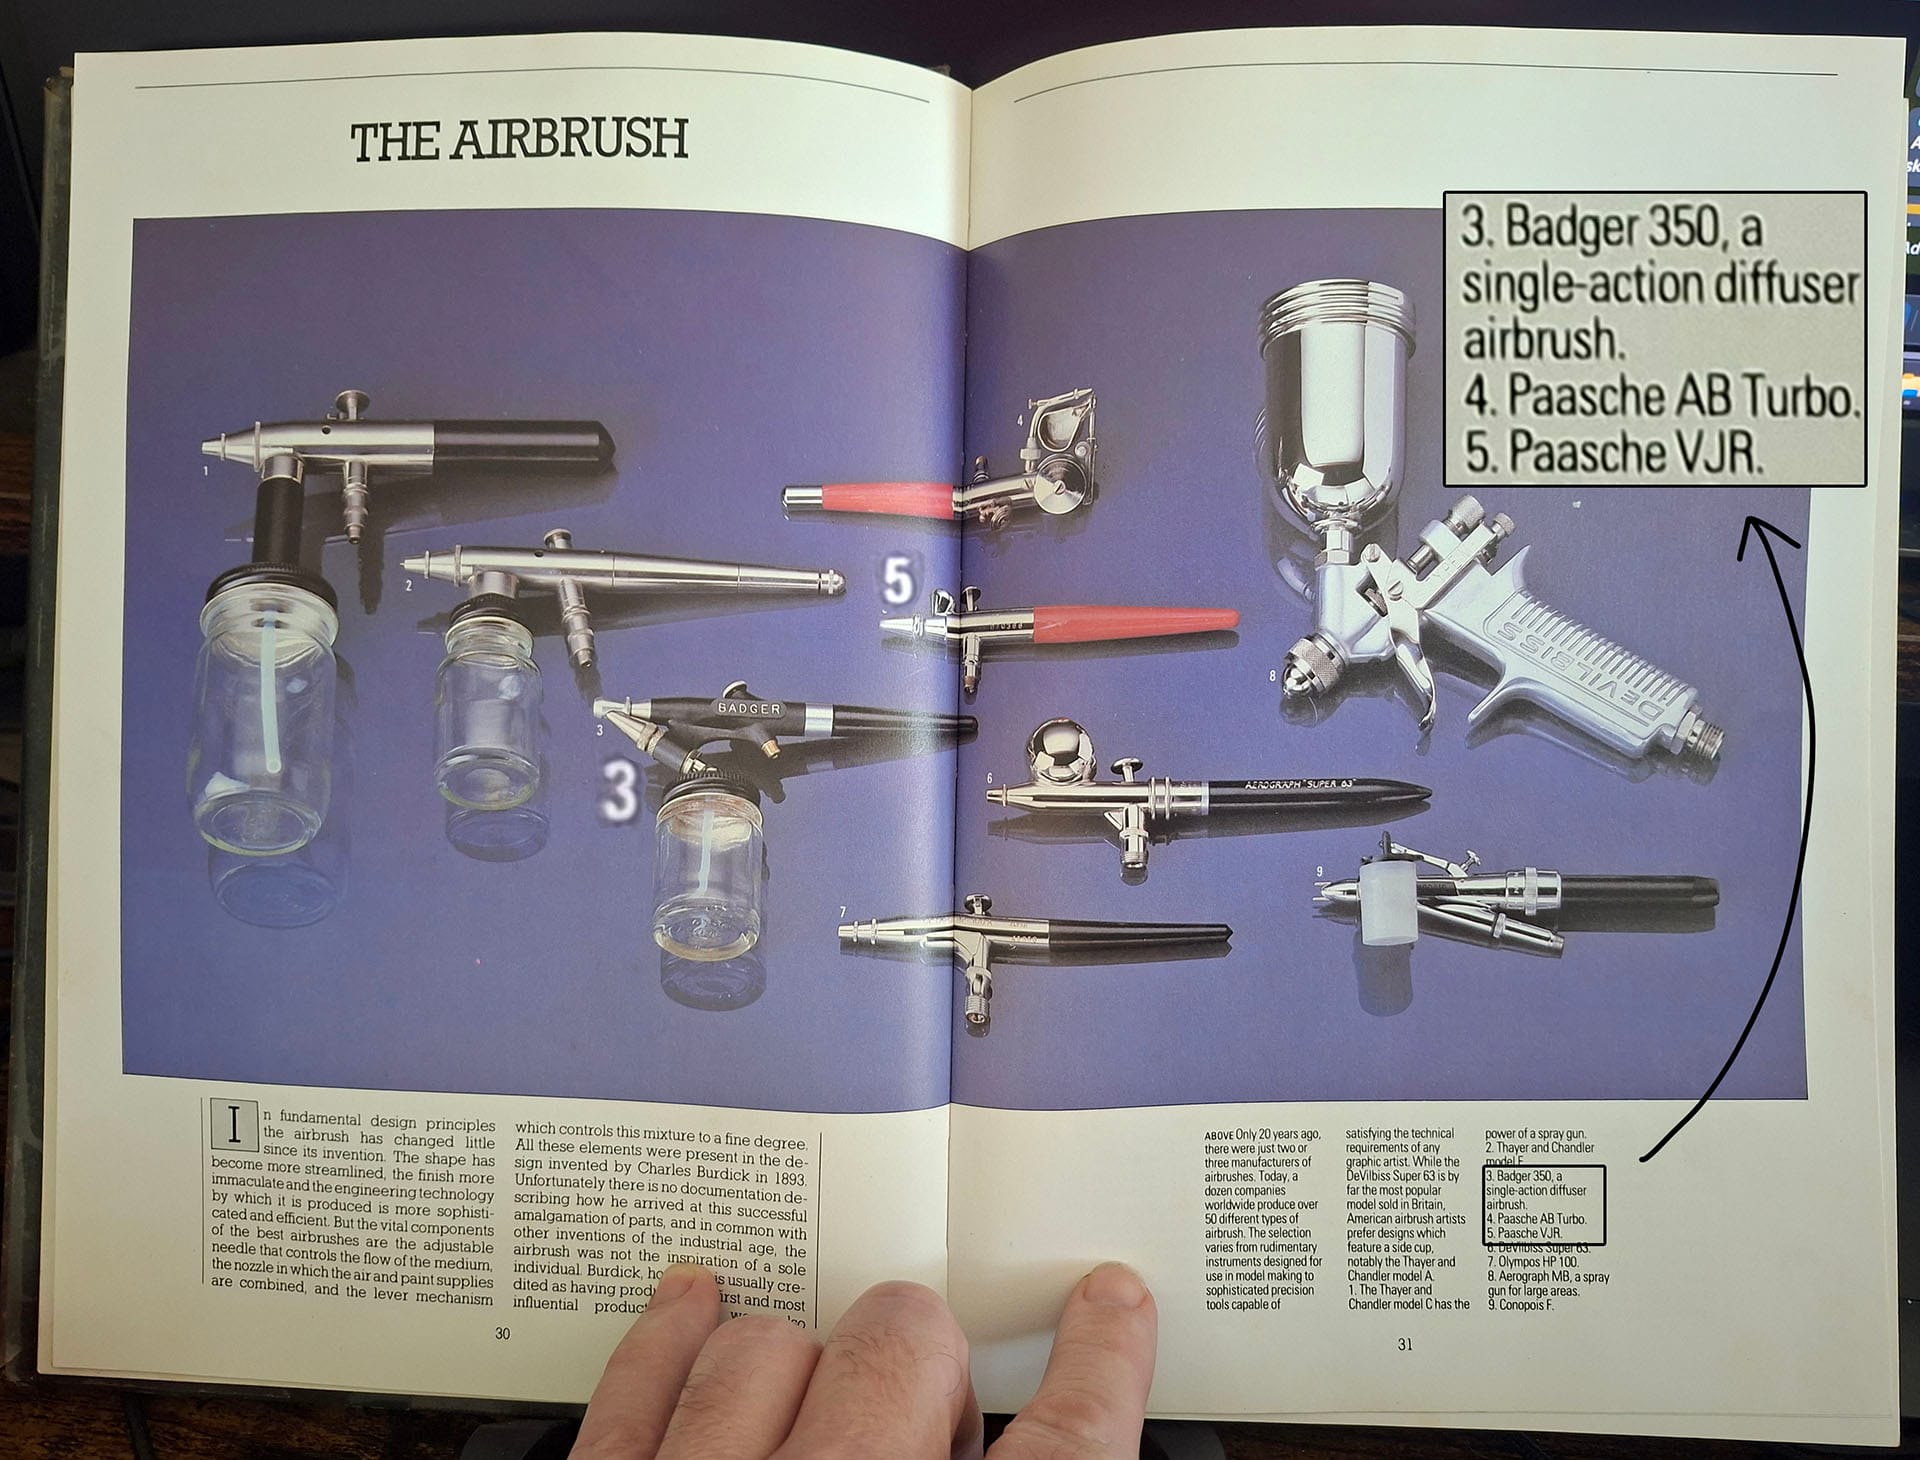
Up until this point I had only played with an airbrush, some basic masking and water colour using one of those cheap sets ('3' below) that came with everything. Syphon feed with various jar attachments, ultra thin hose and cans of compressed air. It wasn't great but as funds were tight that's all I could get my hands on.
3. Similar to my first Airbrush. 5. The Second Airbrush I purchased
In 1994 I upgraded to a Paasche kit ('5' above) — the best thing I could find locally at the time. Still siphon feed, still fiddly, and it blocked constantly. Mid-painting I’d be dismantling, cleaning, rebuilding, and every teardown increased the odds of damaging the needle. I carried spares, which got expensive fast.
I also developed a deeply questionable skill: straightening needle tips by slowly rolling them between my teeth. Not recommended — but I got good at it.
A failed attempt at masking which I abandoned.
Despite the difficulties, I wanted to learn properly, so I enrolled in a short TAFE night course. We used automotive acrylic and mixed colour by hand: eye droppers, tiny ratios, then thinner to get it flowing right.
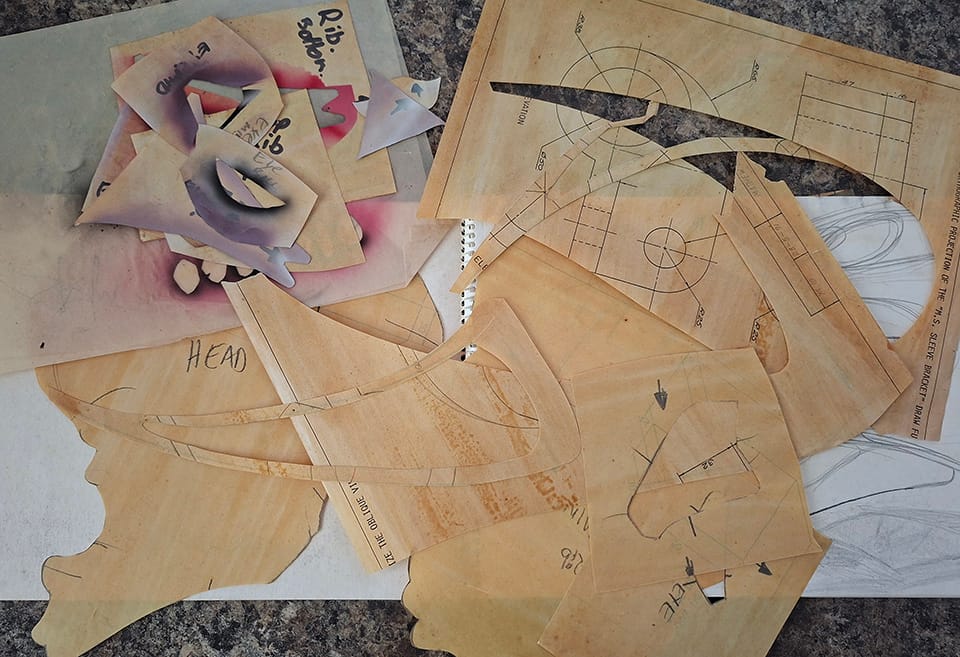
Hand made masking made from old high school engineering drawing sheets coated in thinned varnish
We also learned how to make our own masking/frisk film (Above). Paper plus spray adhesive can work, but once it’s wet with paint it tends to shrink and pull away, leaving tiny gaps. The trick was to coat paper in ultra-thinned varnish — both sides — and let it dry. After that it stayed stable for cutting masks. I used that technique from then on.
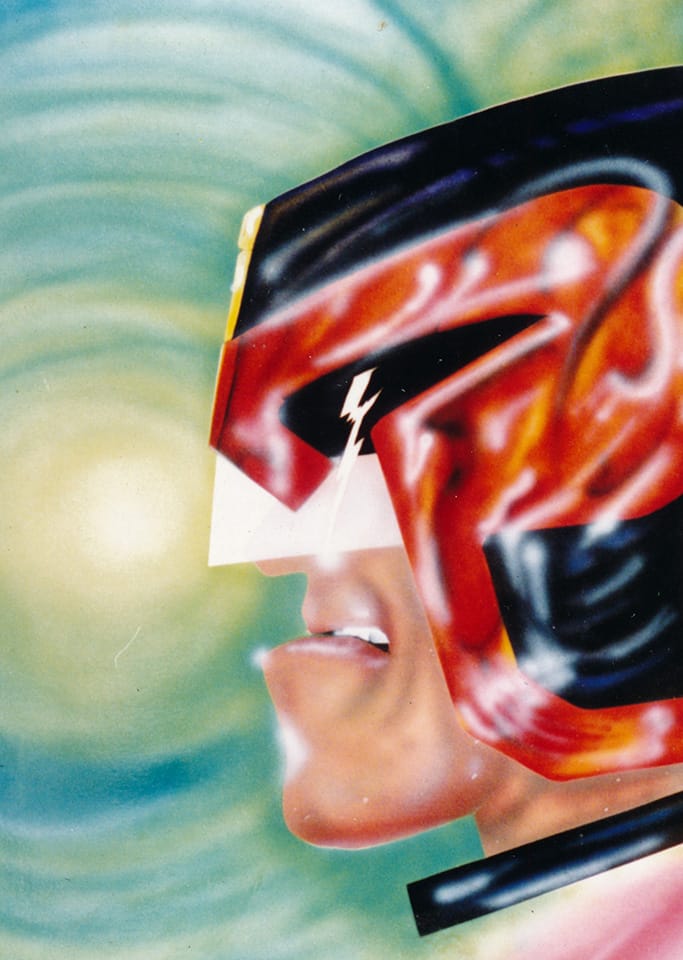
By the end of the course I completed a copy of a Judge Dredd artwork from 2000AD as my final piece.
Airbrush painting with automotive acrylic at TAFE - Judge Dredd copied from 2000AD cover
Around the same time I was heavily influenced by H.R. Giger. I’d read that his paintings were huge and mostly freehand, which made me want to push in that direction too — less reliance on masking, more control through the airbrush itself.
Freehand airbrushing is unforgiving. The trigger control has to be steady and deliberate, and it only takes one attempted “sharp line” to turn into a splat, a splutter, and a run down the canvas.
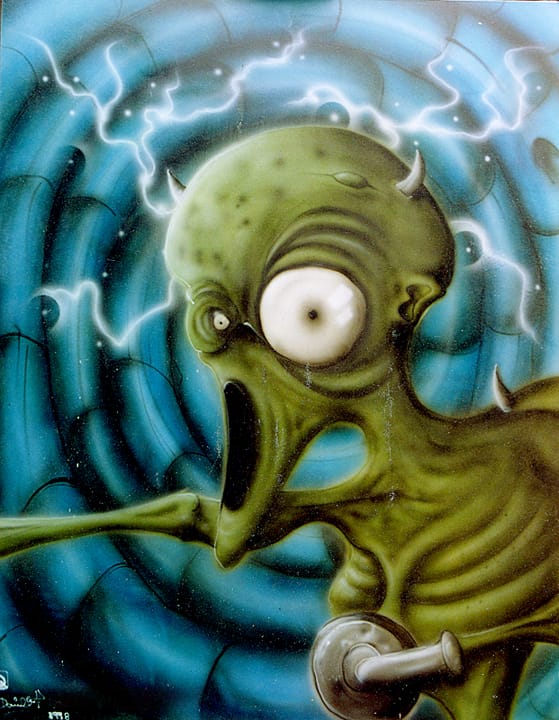
No 1. H.R. Giger influenced, First freehand attempt - 1996 acrylic on card. A1 - 841 x 594 mm
Up until then I’d mostly been painting abstract work in oils. Apart from a few experiments, this was my first real attempt at a complete airbrushed piece. I used standard artist acrylic thinned with water and mixed until it was smooth enough to flow. After the TAFE course, I eventually bought 500 ml tins of automotive acrylic — the primary colours plus black and white — and a big tin of thinners.
No 2. freehand painting 1996 acrylic on card. A1 - 841 x 594 mm
No 2. 2nd freehand painting (1996) — Acrylic on card, A1 (841 × 594 mm) (above) Heavily influenced by H.R. Giger, I pushed for a lot more detail than the previous piece. I was still using standard acrylic watered down until it would flow — not ideal for an airbrush, but it was all I could afford at the time. It caused constant blockages, and occasionally a sudden burp of paint. You can see one of those moments in the splattered highlights around the central top eye. I didn’t have the patience to fix it… so it’s still in there.
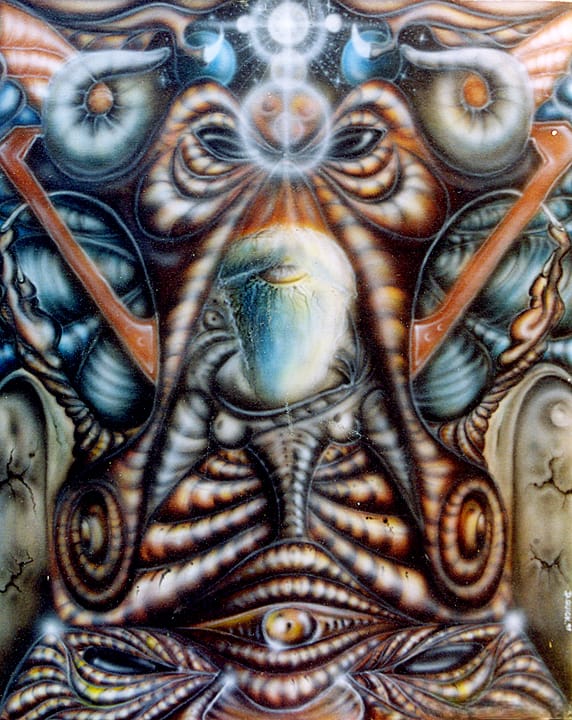
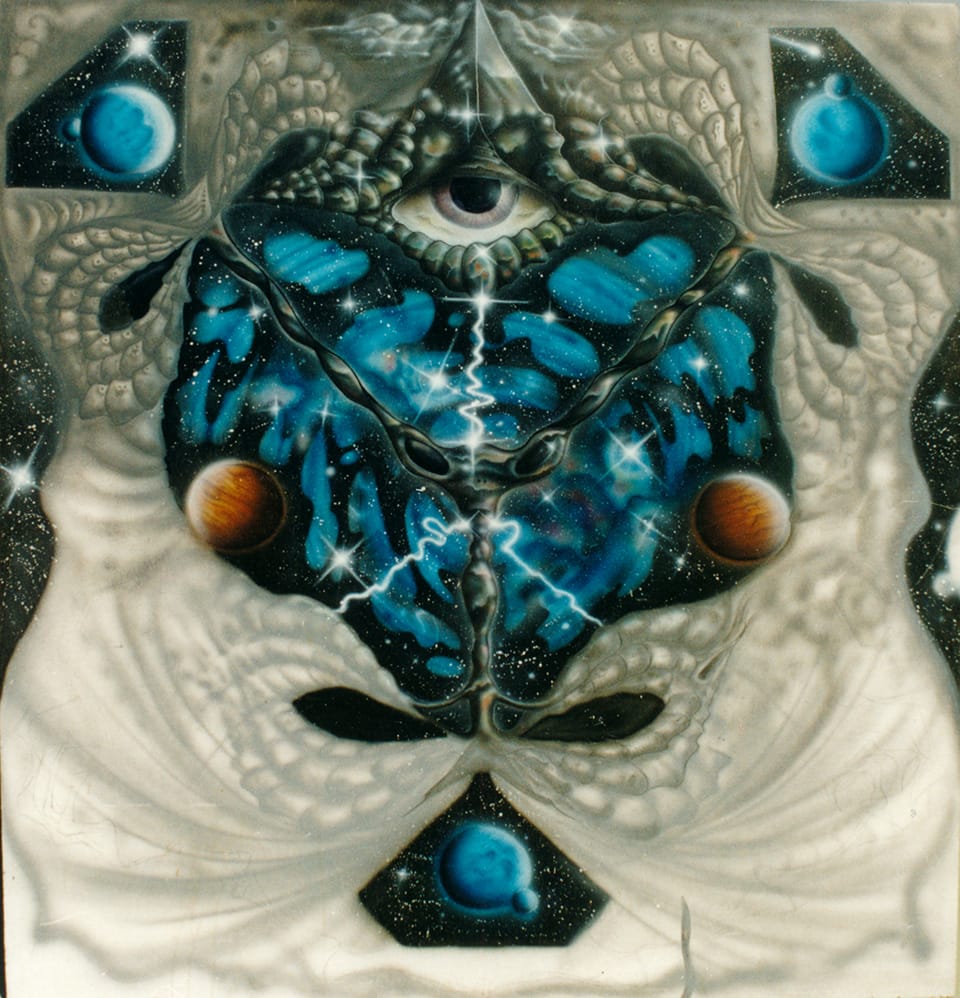
No 3. One World Order 1997 Airbrushed Acrylic on canvas board
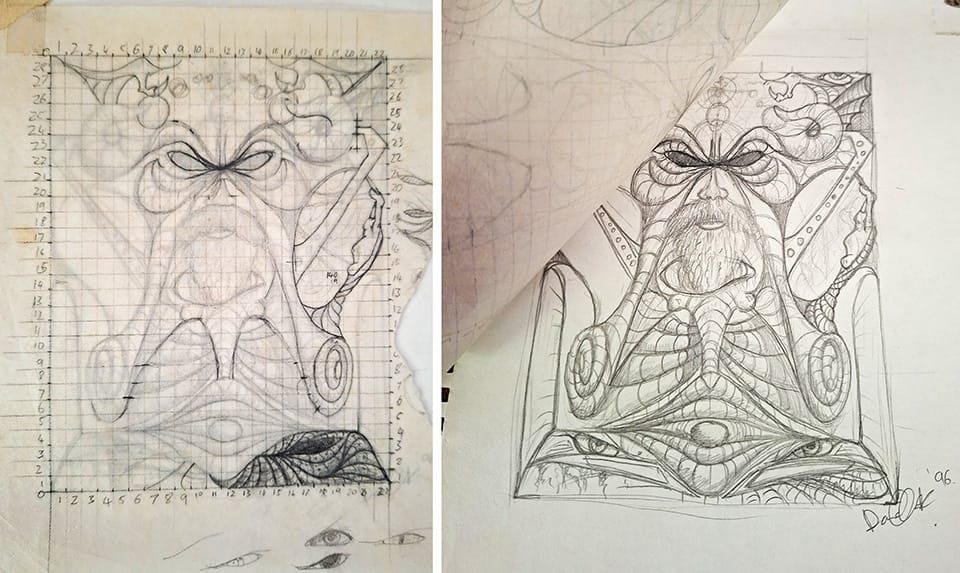
“One World Order” (1997) — Airbrushed acrylic on canvas board, 24" × 30" This is one of the more detailed pieces I attempted in the ’90s. It started as an A4 sketch, then I used tracing paper to build an old-school grid for enlarging it to the final size. Notice I added more detail on the overlay. (Below)
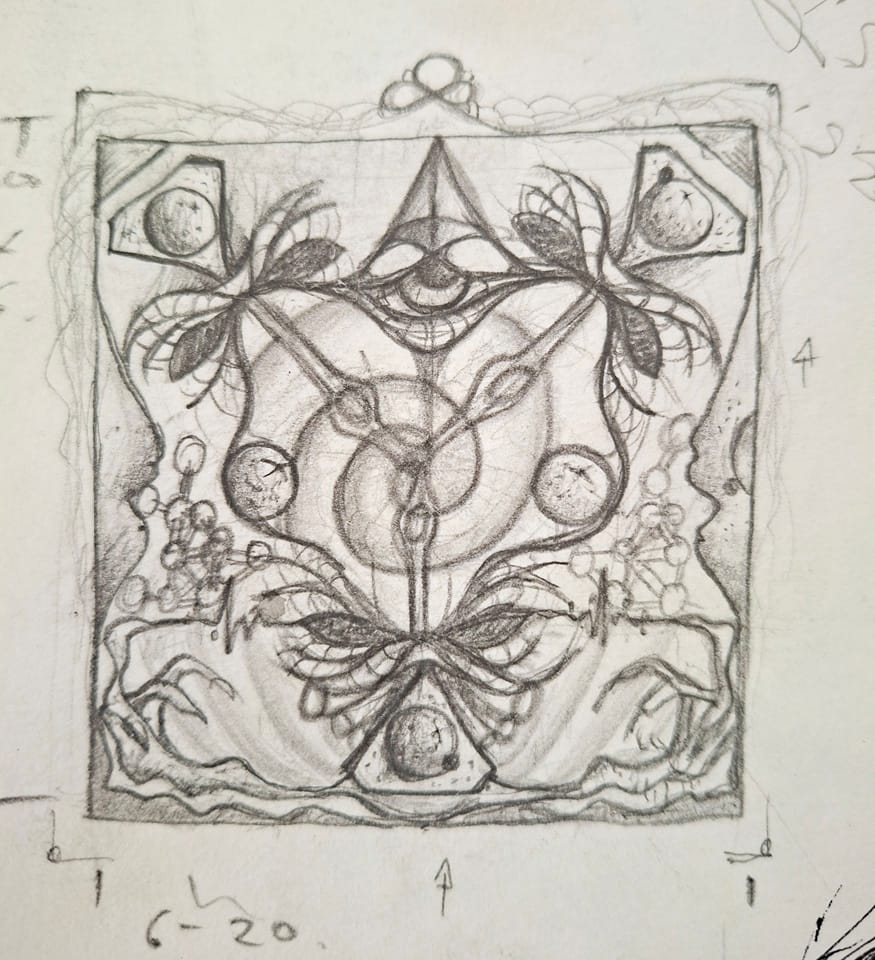
One World Order original sketch with tracing paper 1996
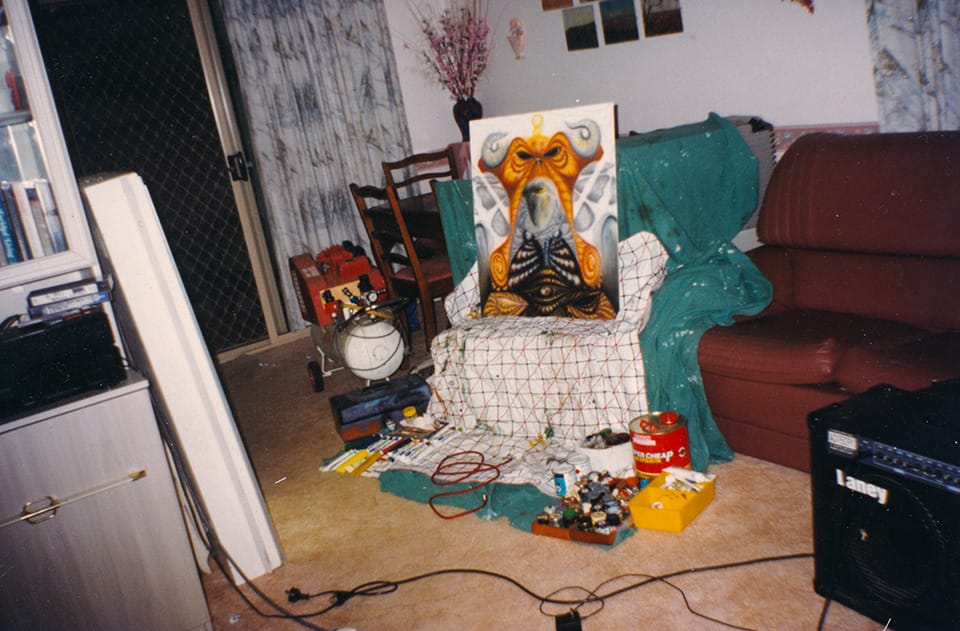
My parents were away for the weekend, so I moved indoors and painted into the evening — compressor inside as well. Big. Industrial. Loud. They never knew. Drop sheets everywhere, no trace left behind. 🤣
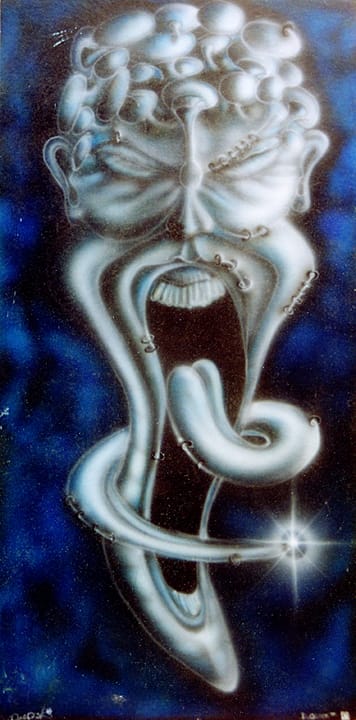
Airbrushing in the lounge room when the parents are awayNo 4. Dream State 30cm x 25cm No 5. Endless 'Mushroom Man - Airbrushed acrylic on ply
No 5. “Endless (Mushroom Man)” (1997) — Airbrushed acrylic on ply, 1200 × 500 mm Mushrooms for hair, a pierced tongue, and exaggerated facial features
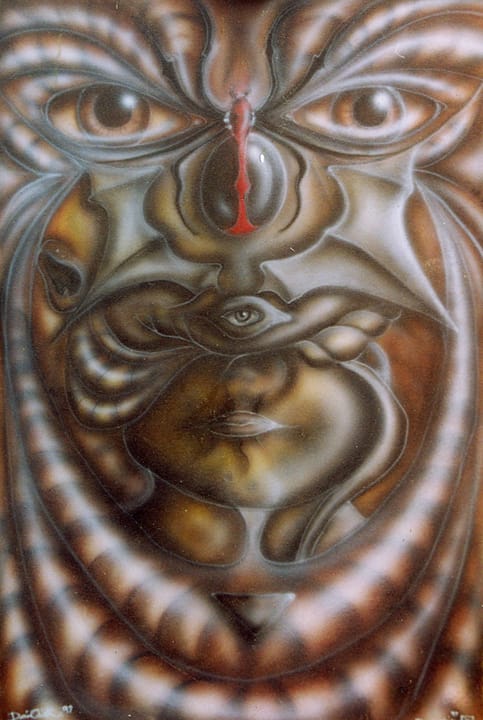
No 6. Bizarre Waste of Power 1997 — Airbrushed acrylic on masonite and Original Sketch 1996
No 6. Bizarre waste of power. 1997 — Airbrushed acrylic on masonite. This one was sparked by a set of disturbing reference photos I was shown at the time — preserved medical specimens, including a “cyclops baby” image. They were claimed to be connected to Chernobyl, but I’ve never been able to verify that, so I’m treating it as part of the story of how the reference found me, not a statement of fact. Everything beyond that central idea is artistic licence. It also ended up with a custom frame, with runes burned into the timber using a soldering iron. (I will update this post when I find where it is)
No 7. Skull. 1998 Automotive Acrylic on ply.
No. 7 — “Skull” (1998) — Freehand air brushed automotive acrylic on ply, 1800 × 600 mm This one’s huge. I painted it using automotive acrylic (mixed by hand — I can’t remember the exact ratios now, but I loved the finish). Humidity can be a pain with this stuff too; if it’s too cold or too wet you can get that white “blooming” in the paint. This piece has two clear coats.
No 8. Mutant Trolley Boys 1998. Automotive Acrylic on card
No. 8 — “Mutant Trolley Boy” (1998) — Airbrushed automotive acrylic on card, 600 × 500 mm This was a character concept from a comic idea I called “Mutant Trolley Boys.” I never got past the design stage, but it’s one I still want to revisit.
The premise was pretty simple: the Mutant Trolley Boys formed while dragging abandoned shopping trolleys out of creeks and parklands. After pushing them for long enough, they eventually became one with the trolley.
I’ve still got the storyboard for this, plus another related idea: “Maggot Man vs the Mutant Trolley Boys.” That one could work as a comic, or even an animated series.
No. 9 "Alien" (1997) — Airbrushed acrylic on ply, 1200 × 1200 mm
No. 9 "Alien" (1997) — Airbrushed acrylic on ply, 1200 × 1200 mm Unfinished. This one’s been living with a friend for years — I moved into a motorhome for a while and it definitely didn’t fit.
I might ask if he wants me to finish it and give it a proper final clear coat. If he does, he can keep it as a gift for looking after it for so long.
No. 9 "Alien" (1997) original sketch designs
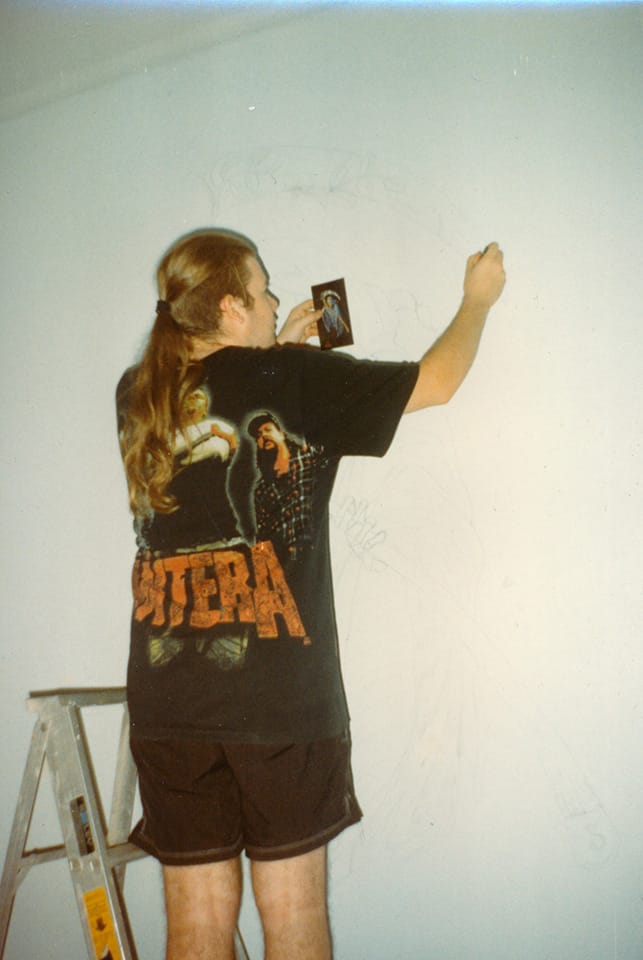
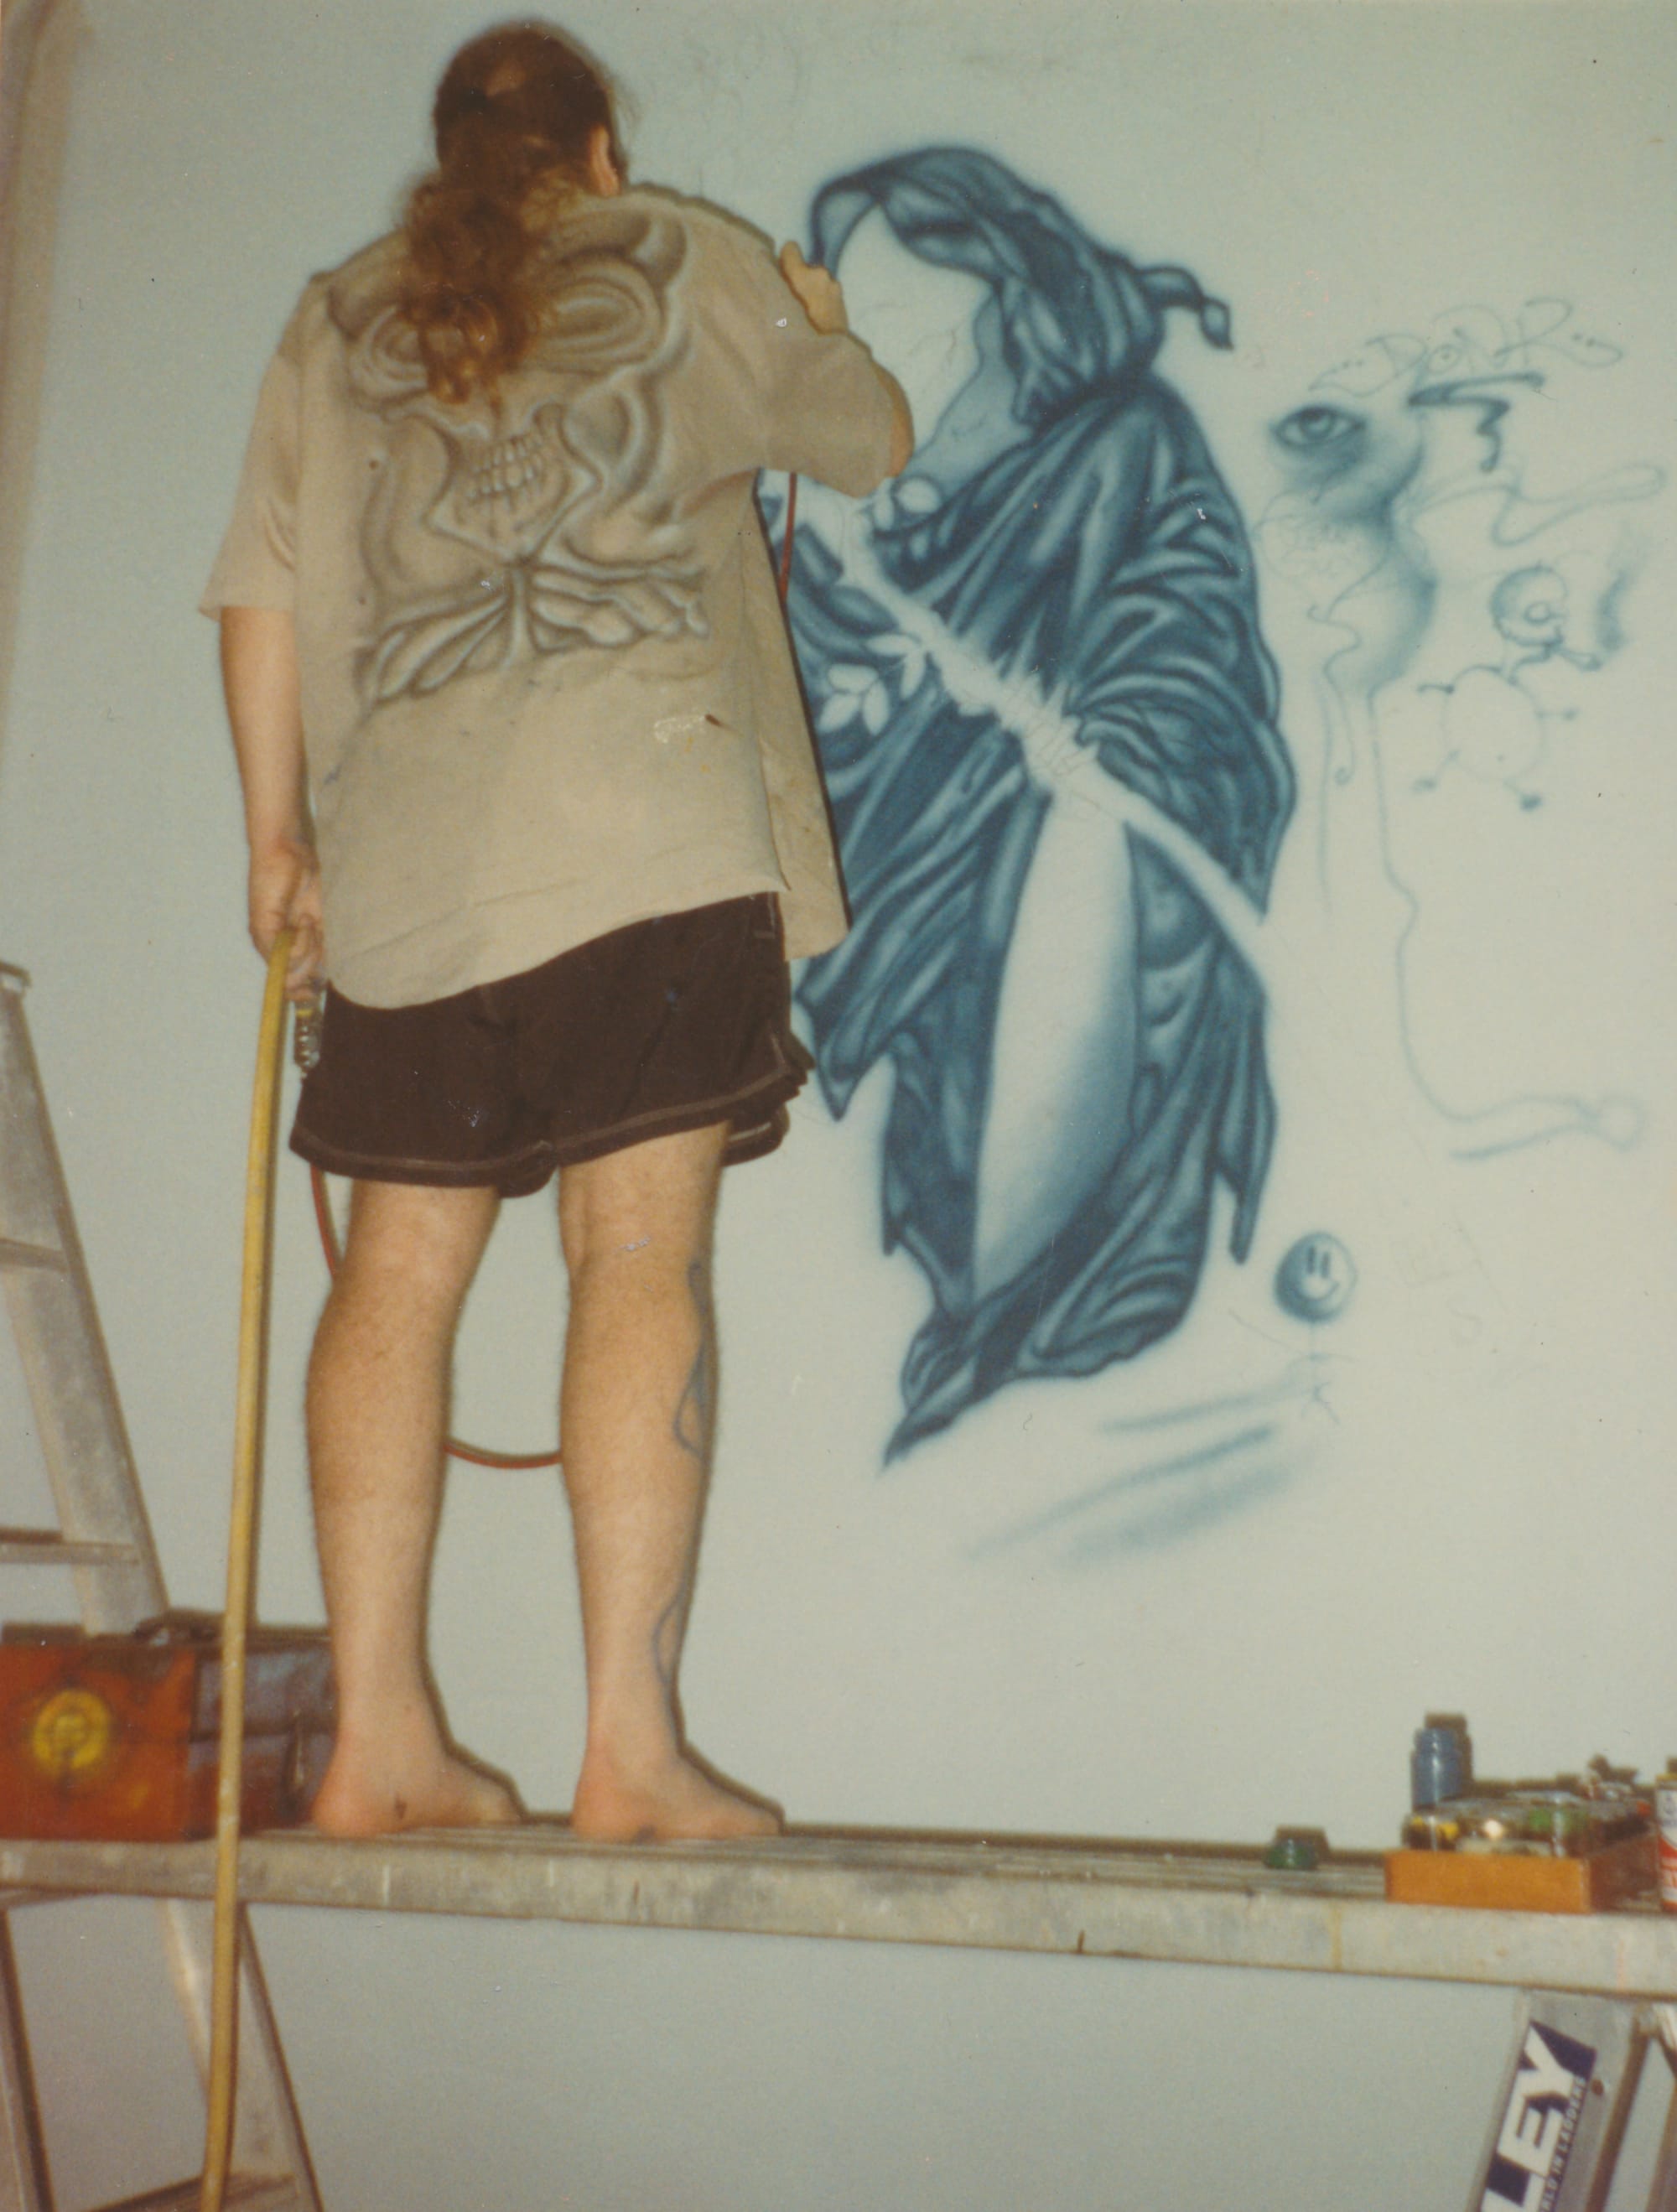
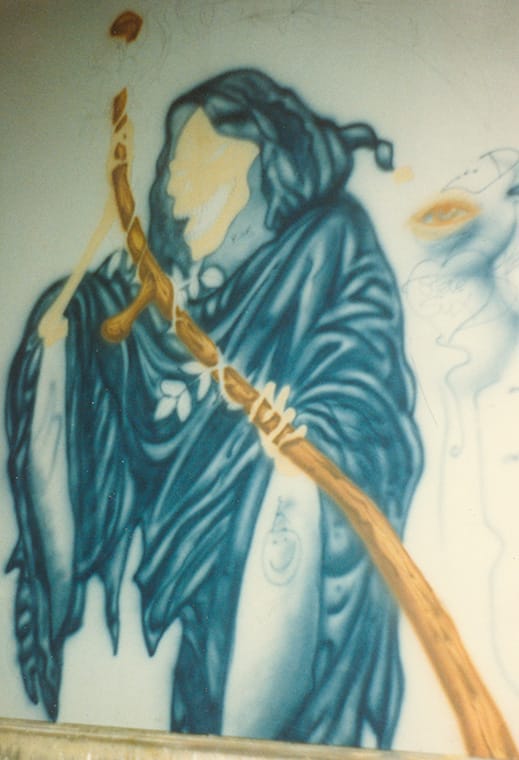
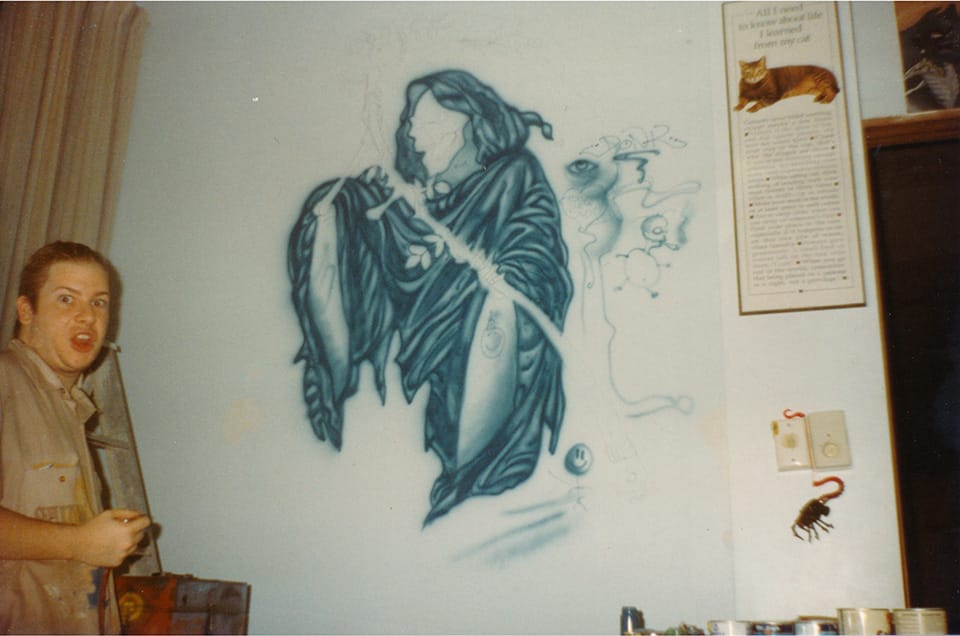
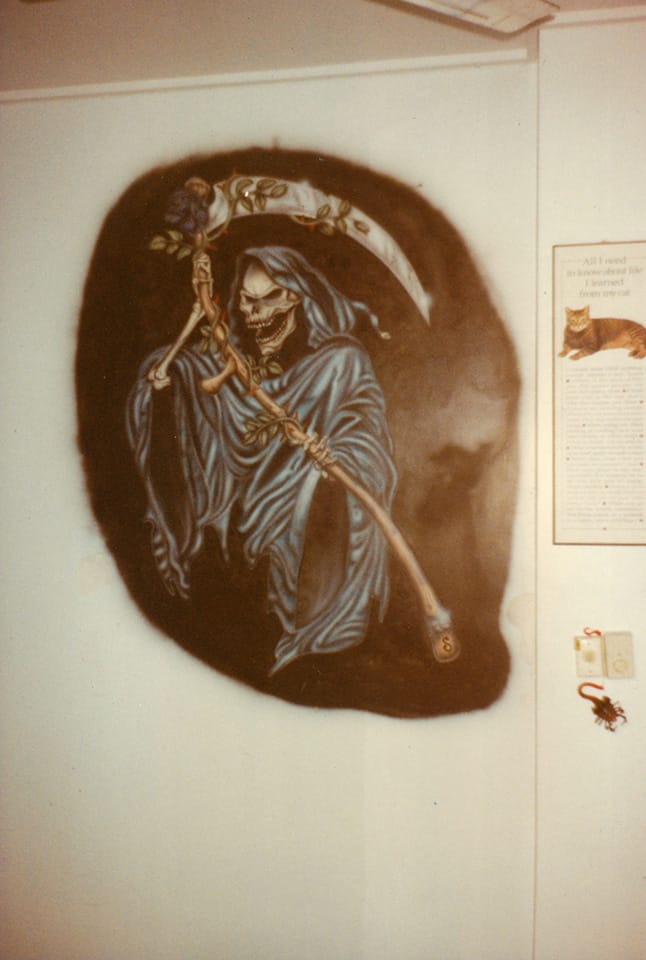
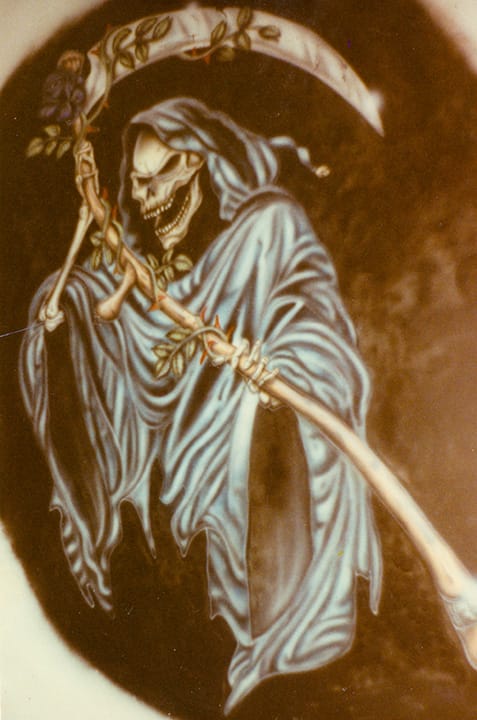
“Death” (1997) — Airbrushed acrylic on concrete
“Death” (1997) — Airbrushed acrylic on concrete I was living at a friend’s place at the time, and they let me paint on a couple of the walls. This one was based on an artwork I’d seen on a postcard, enlarged by hand (no projector back then). The plan was to paint the rest of the wall black… but I’m not sure it ever happened.
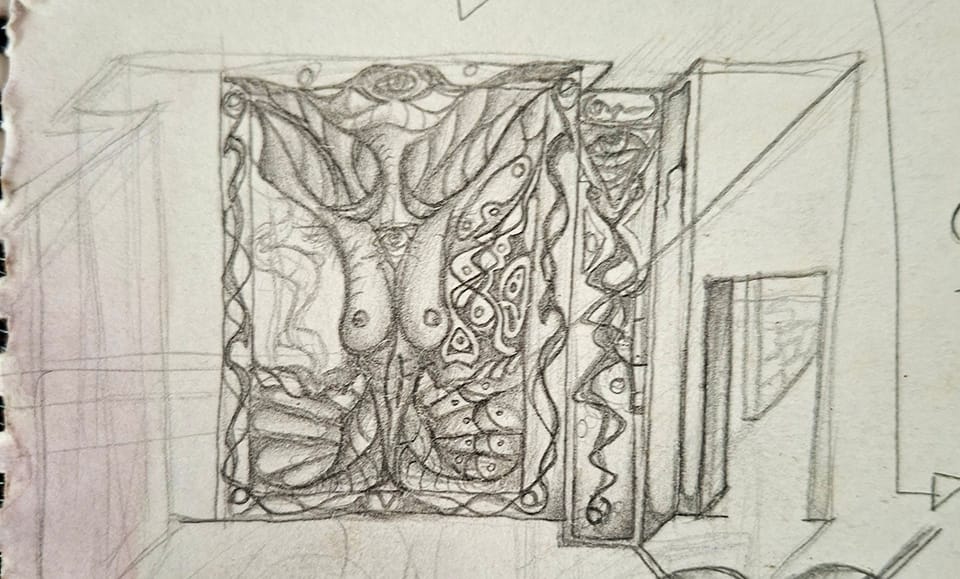
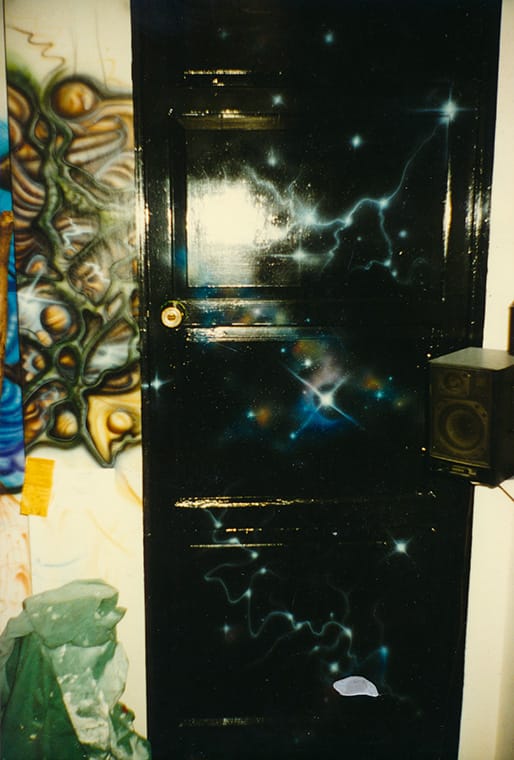
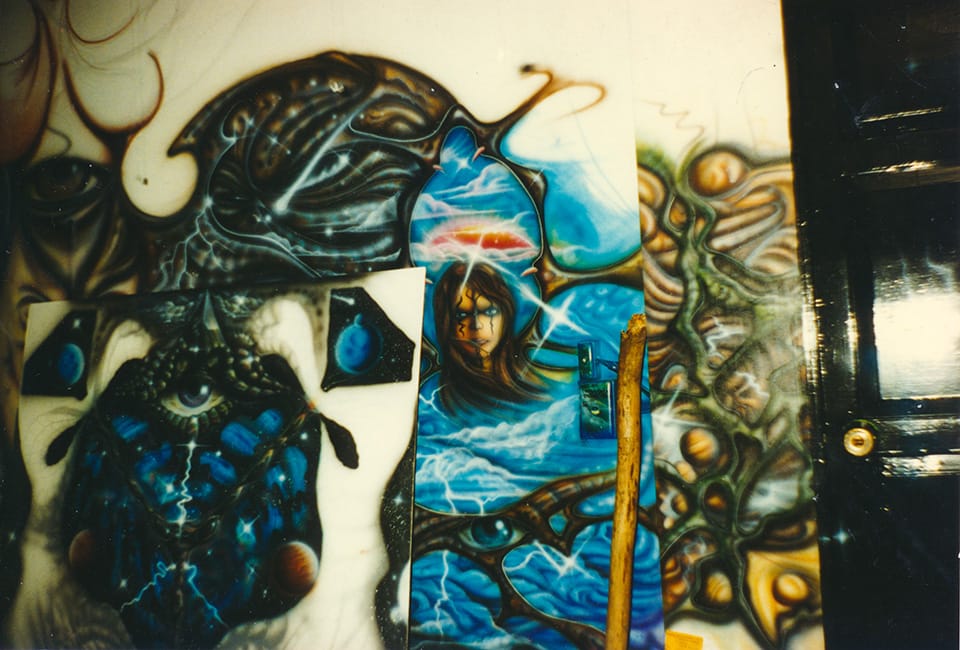
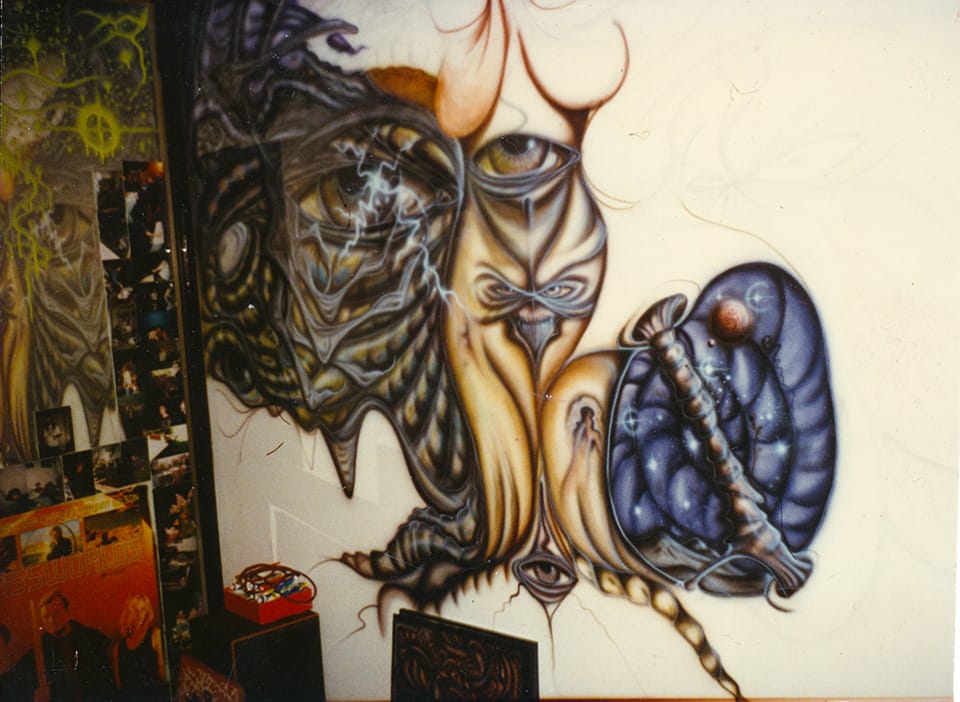
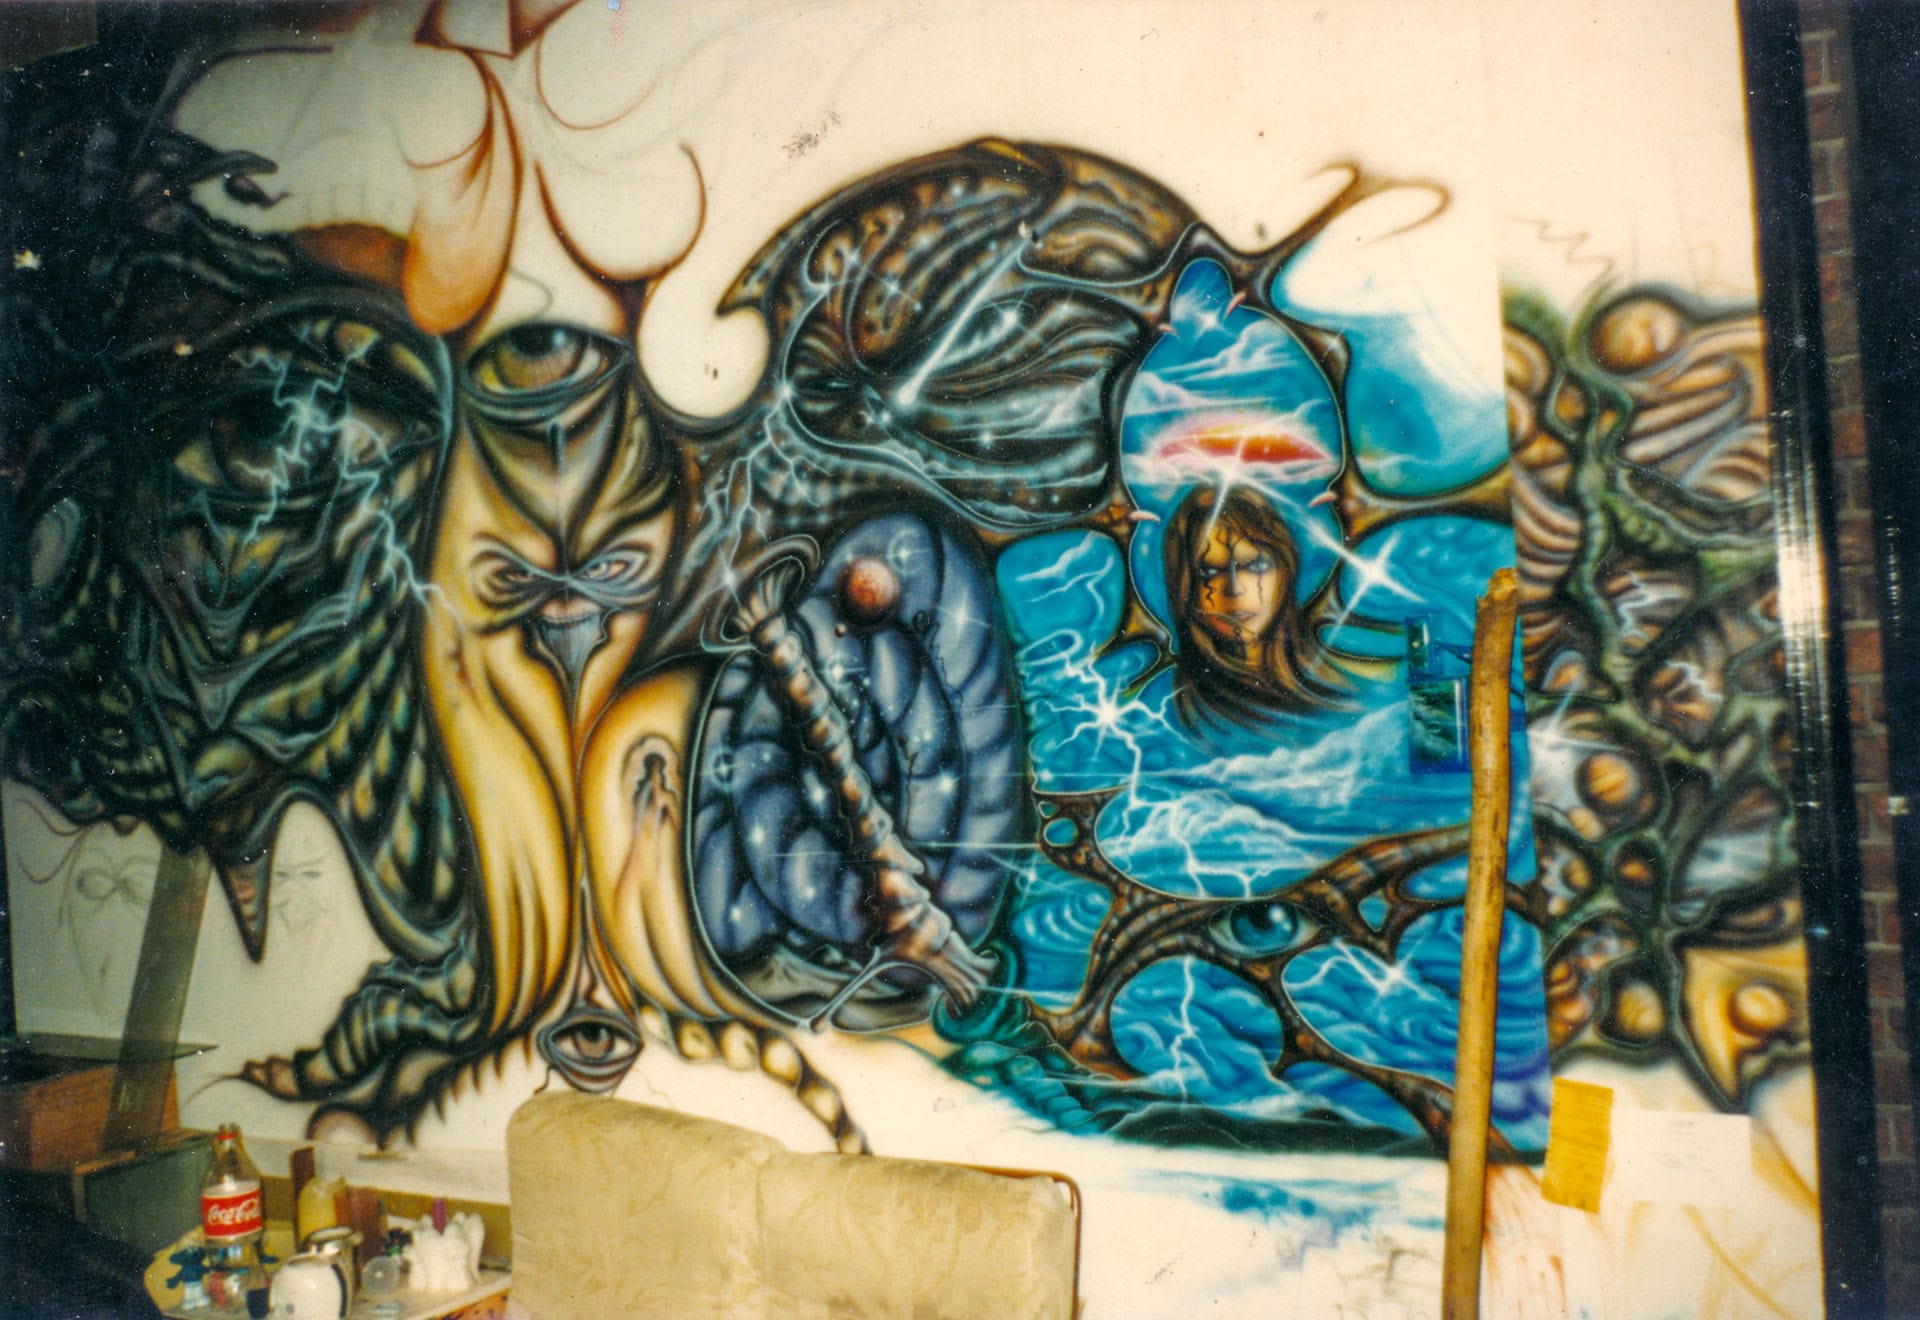
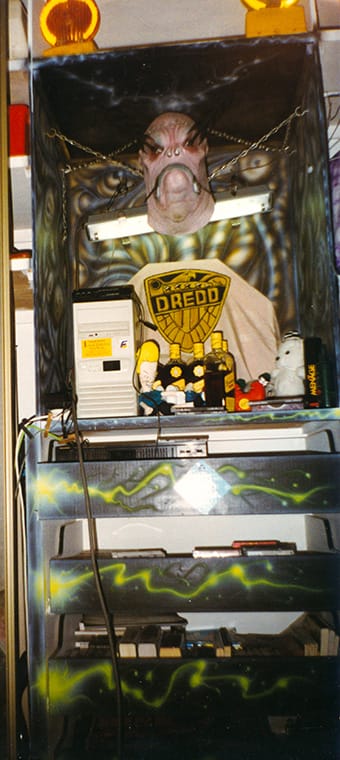
“My Bedroom” (1997) — Airbrushed acrylic on concrete (and various other surfaces) Directly behind the Death painting in my friend’s room was my room. My parents randomly decided to leave the country, so I suddenly needed somewhere to stay. My friend and his parents had a spare room, so I moved in.
The place was still mid-renovation — bare walls that needed paint — and I suggested I paint the room with artwork instead. They agreed, which honestly surprised me. The walls, door, and even the inside of the cupboards ended up covered in airbrushed pieces. The main wall was never finished before I moved out.
That house has been sold since, and I was told the room artwork got painted over… but the cupboard artwork apparently still exists to this day.
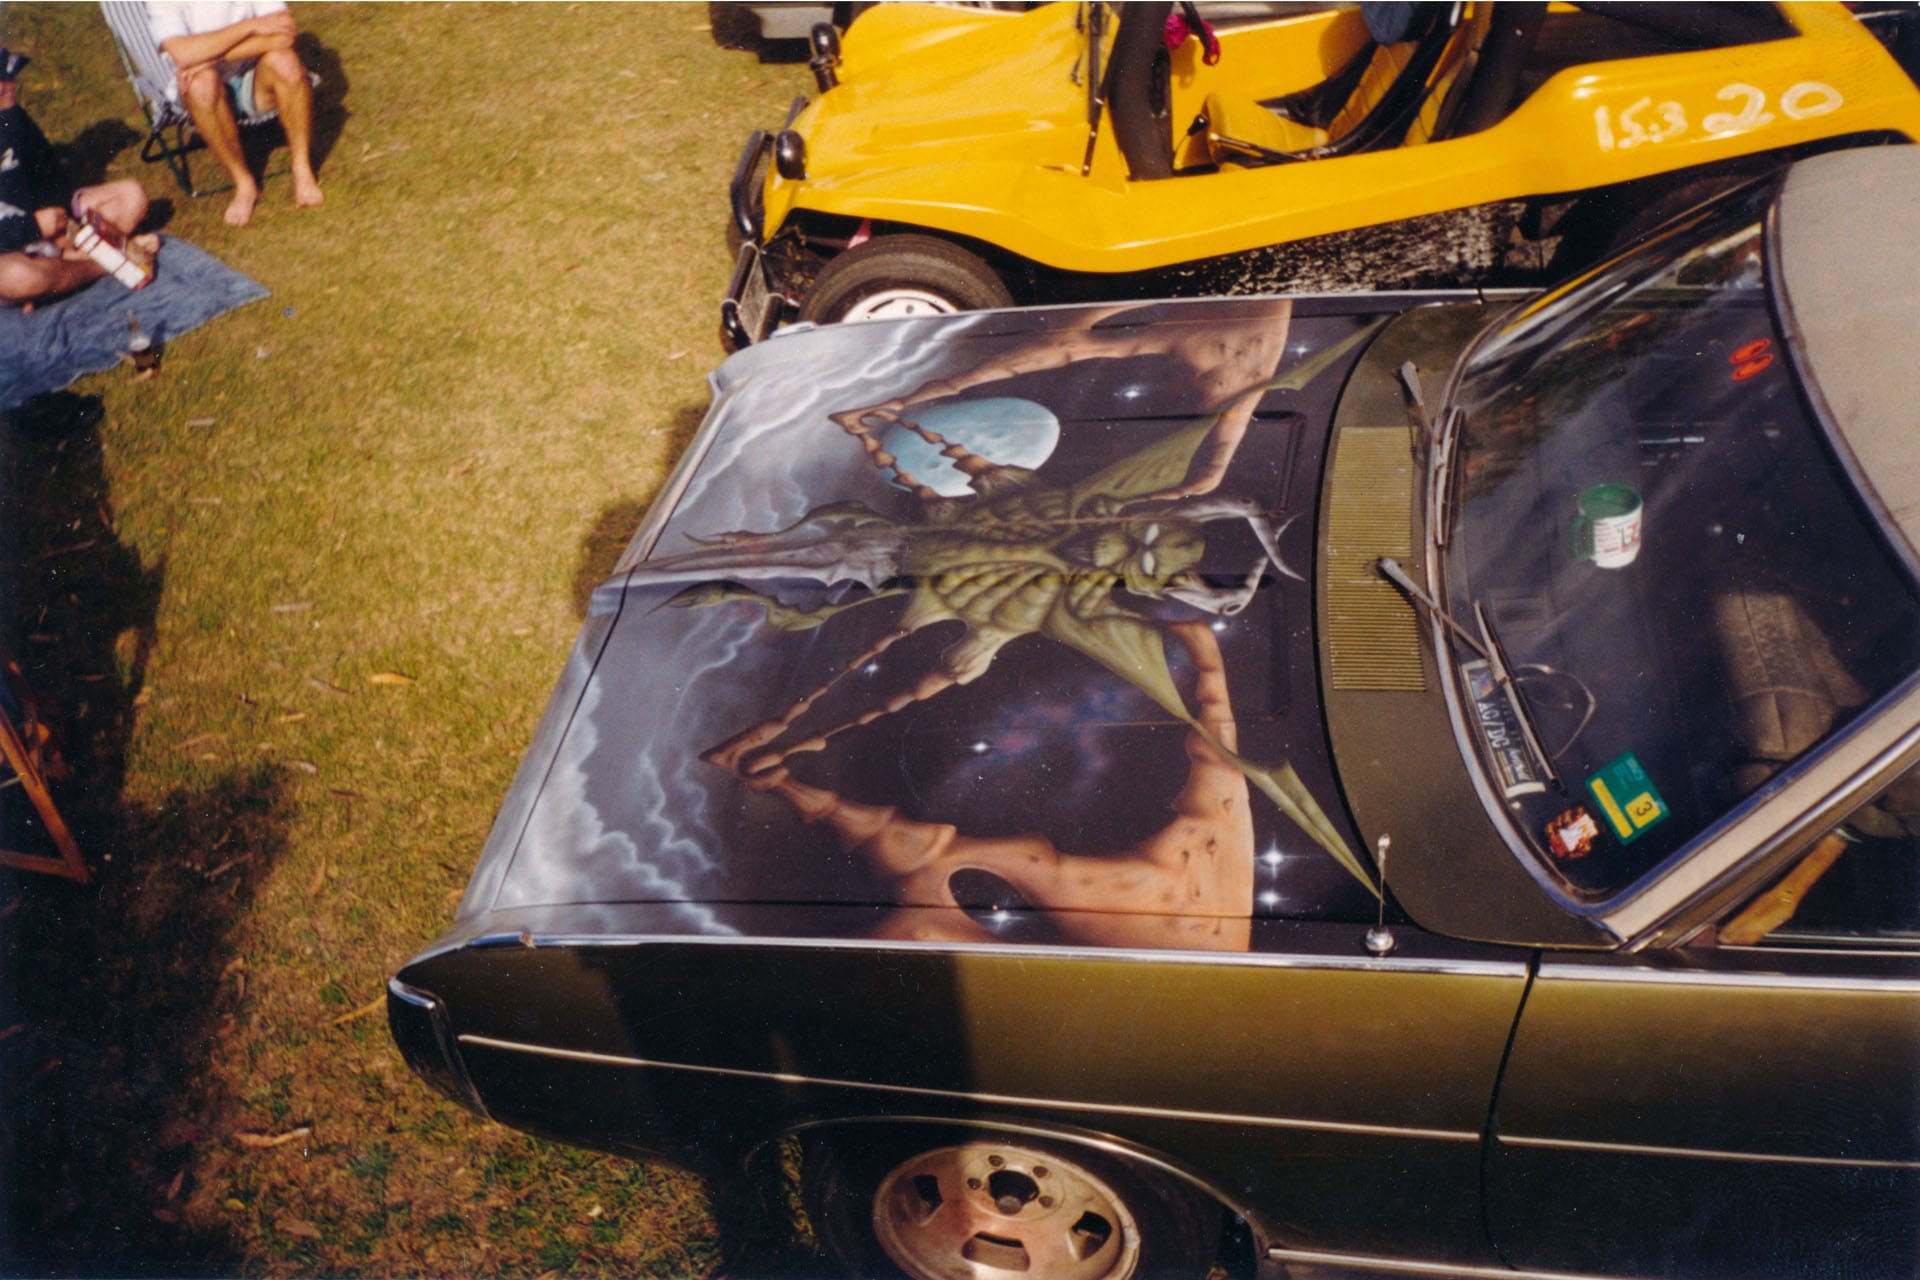
“Demon in Space” (1998) — Airbrushed automotive acrylic on a Chrysler Charger Some friends were heading down to the Bathurst 1000 from Queensland and wanted something to show off. The original plan was to paint the whole car, but time (and reality) meant we only finished the bonnet.
Unfortunately, the artwork has since been destroyed.
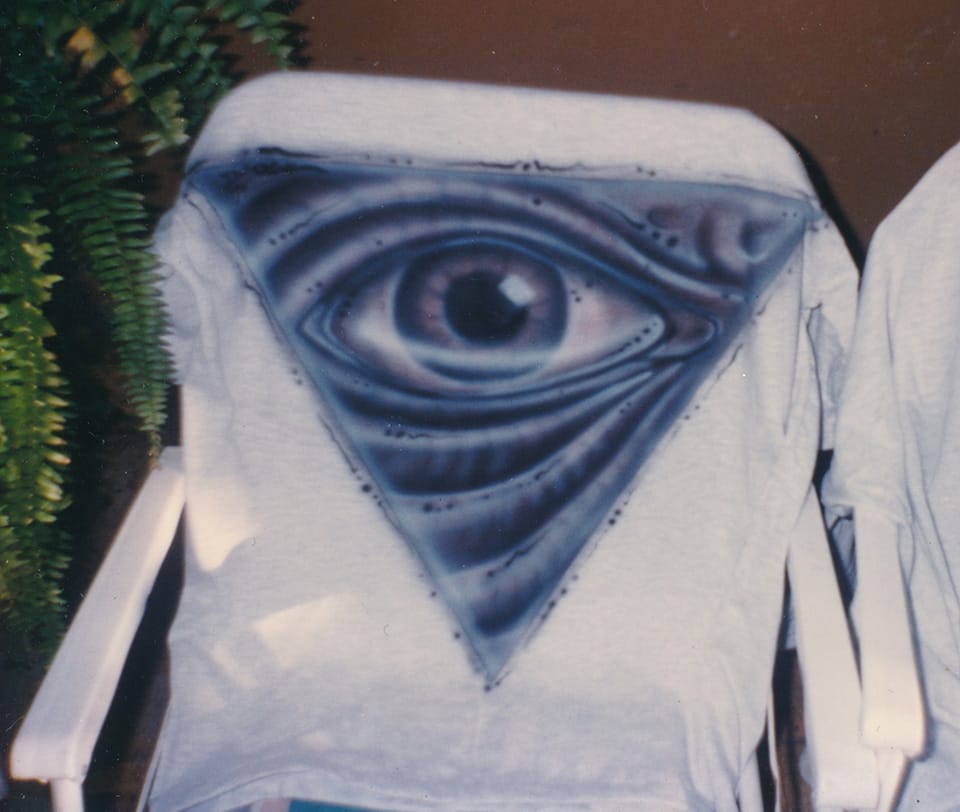
Airbrushed T-Shirt which failed to sell at markets.
Painted T-shirts (1998) — Airbrushed screen print paint This was my (mostly failed) attempt at hand-painted T-shirts. I used screen print paint, which is probably the hardest stuff to thin for an airbrush — and this was before there was decent T-shirt paint formulated specifically for airbrushing.
A friend and I painted about 20 shirts for the markets and sold… nothing. We only tried one market once, then never went back. Looking back, we probably should’ve stuck it out, because we did get a bunch of enquiries for custom designs. We even took a small setup to demonstrate painting live.
I still have some of those shirts in a box in 2026. They see me hoarding. 🤦♂️
Although I did keep going with the airbrush for a while, it eventually got pushed to the side when music took over — writing tracks and getting deep into techno and drum & bass. I spent the next few years focused on that, playing around the local live scene, and I didn’t really return to airbrushing until 2003 and beyond… which is another story for another time.
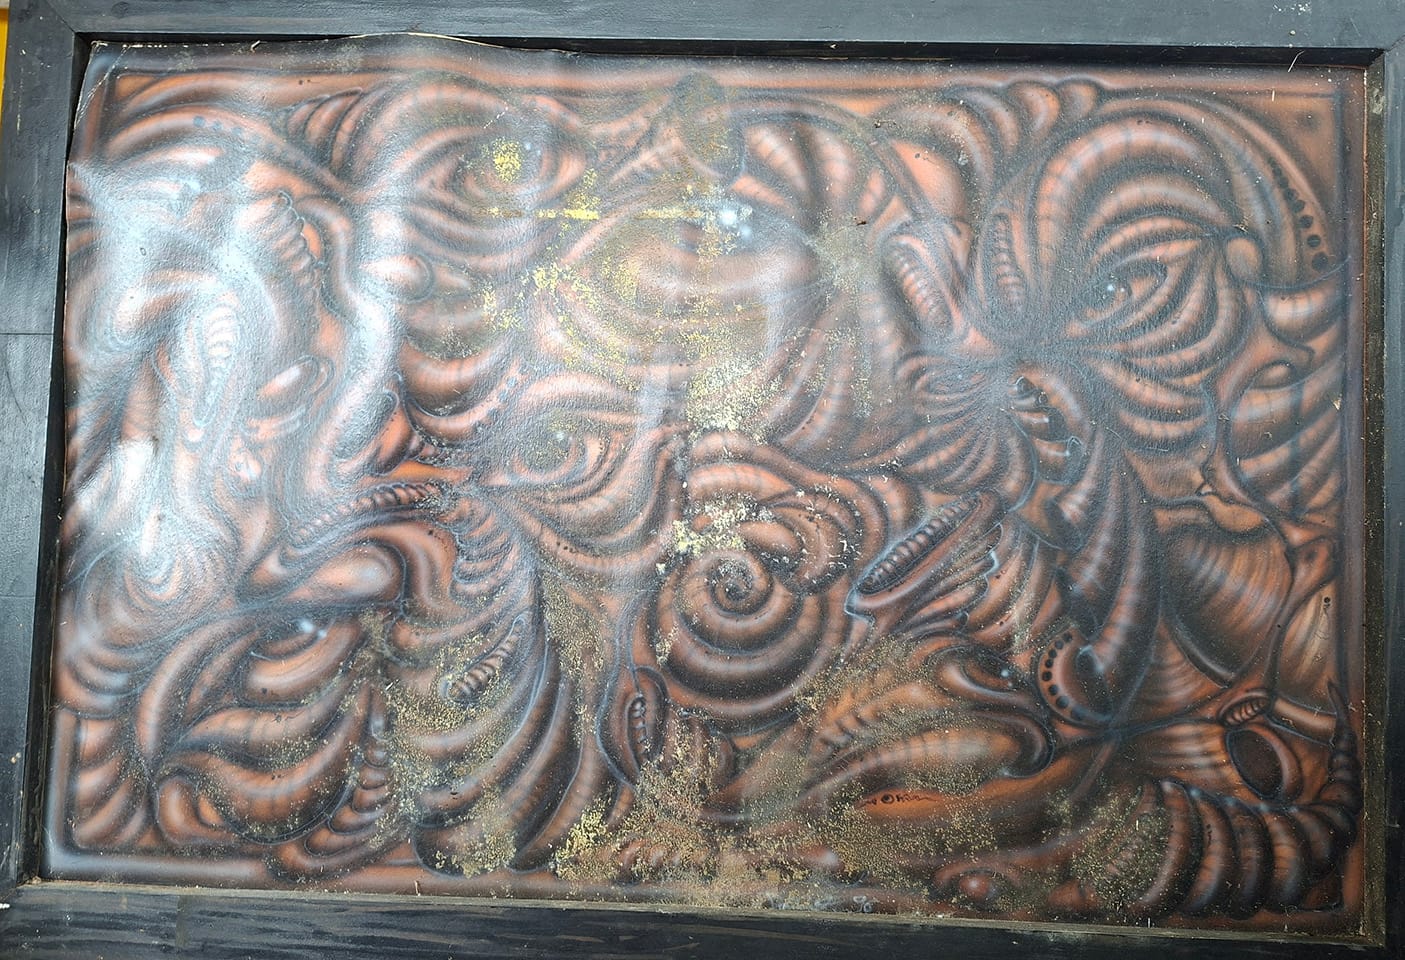
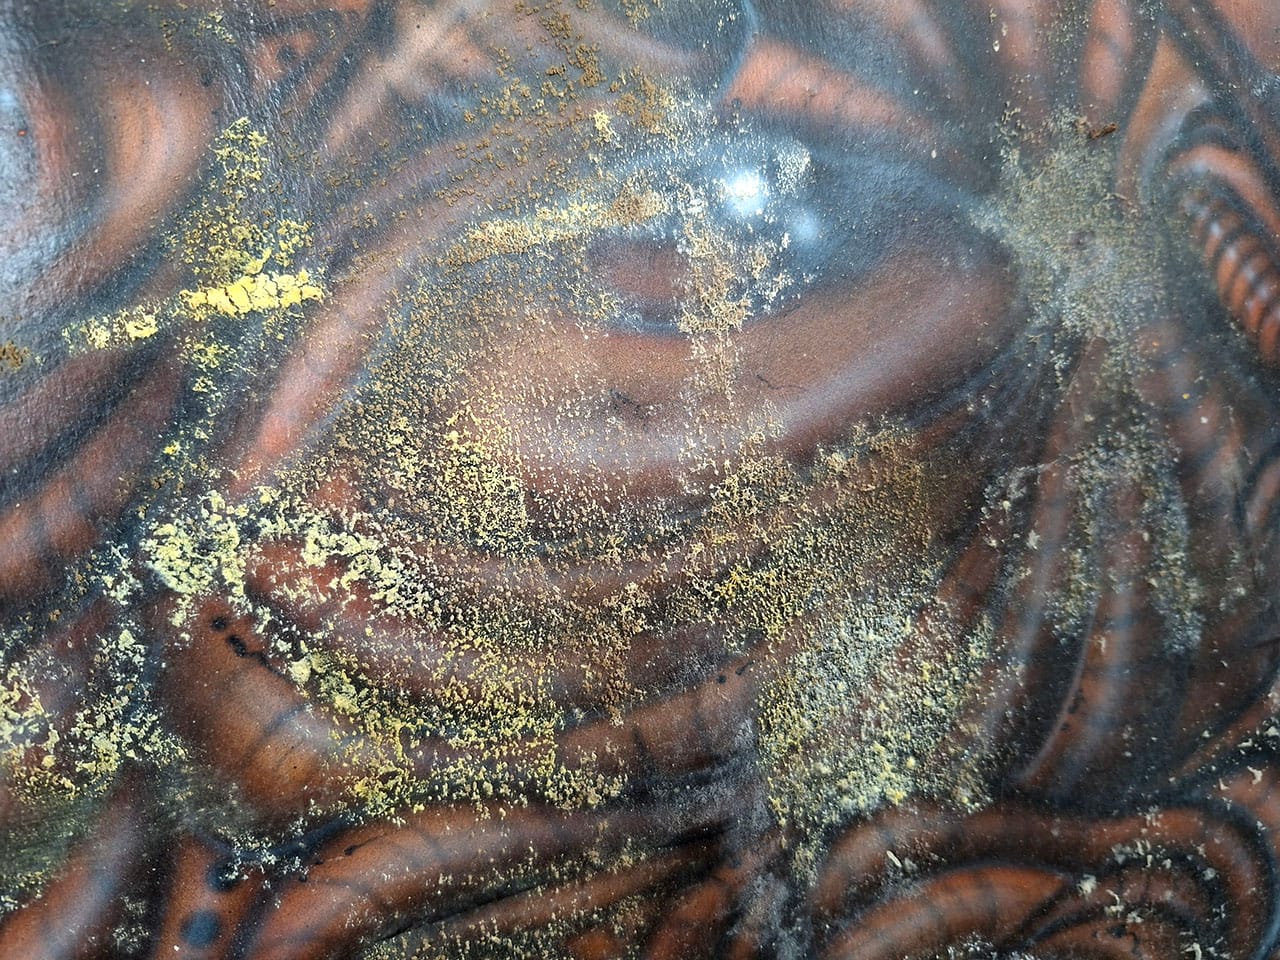
Apart from a few paintings I gave away, I kept most of these early pieces and dragged them through house move after house move as “art for my own walls.” Unfortunately they were stored in a couple of places that later had water and flood damage, and a lot of them were ruined. I still have what’s left, but I’m not sure they can ever be properly restored.
And honestly? I’m not that concerned. These were experiments — practice pieces. I never meant for them to be grand artworks or anything to sell. I just painted because I wanted to paint. I do look at them now and feel a bit disappointed that I didn’t take better care of them… but I’m actually fine with it. They did their job.
Here’s what a few of them look like now — scarred, watermarked, and mouldy.
2026 Current state with water and flood damage.
Everything on this site is free for everyone. No ads. No popups. No paywalls. Subscribe to receive the free monthly newsletter, and you’ll be able to comment on posts. If you’d like to help keep this project sustainable, there are Supporter and Sponsortiers available - Totally optional.